Thursday, January 9, 2014

Baby Shower

This card was made for my niece's baby shower. They were keeping the gender of the baby a secret so I wanted to go with bright colours for something a little bit different.


Materials:
Cardstock: Shimmery White, Bashful Blue, patterned papers "Bright Side" by Lawn Fawn
Ink: Tuxedo Black, Versamagic Cloud White, Pumpkin Pie marker
Stamps: Plus One, Sunny Skies, Say Cheese, all by Lawn Fawn
Accessories: Baker's twine from The Twinery, orange and purple rhinestones, pink polka dot washi  tape, vintage glass look button
Tools: Big Shot machine, Say Cheese Lawn cut dies by Lawn Fawn, corner rounder punch, Dazzling Diamonds glitter glue, dimensionals, white gel pen

Tuesday, January 7, 2014

Personalised Wedding Card

The trickiest thing about this card was doing the alphabet stamping. It's a simple card and I'm happy with the result. Except for the bow. I have to get a bow tying device.


The cardstock was a shimmery white in real life which isn't caught by the camera here.

Materials:
Cardstock: Shimmery White, Blushing Bride
Ink: Tuxedo Black, Blushing Bride
Stamps: Happily Ever After, Sally's abc's, both by Lawn Fawn
Accessories: Striped organza ribbon, Basic rhinestones
Tools: Nestable square dies, dimensionals

MIA

Yep, still here! I went through a stage where I totally lacked creativity and was just casing other people's cards but I've found my mojo and I'm back to making up my own designs.

I probably won't post the cards in as much detail as before but these cards are not difficult to work out. Let's start with these two:


Same card, different colours.

Materials:
Cardstock: Not Quite Navy, Basic Grey, Brushed Silver, Old Olive, Chocolate Chip, Cajun Craze
Ink: Basic Grey, Not Quite Navy marker, Cajun Craze marker.
Stamps: Teeny Tiny Sentiments, Tool kit both from Stampin' Up, Chevron background by Hero Arts.
Accessories: Grey baker's twine from The Twinery, silver washi tape.
Tools: Big shot machine, top note die, dimensionals, Sakura clear glitter pen, Modern Label punch, Diamond plate embossing folder.

Thursday, May 31, 2012

Bright Birthday

Hi there, I'm still making cards just have been so busy I've not gotten around to posting them. Let's start with this one that I made back in April.

The layout was cased from another card. I have the picture of it but not the website or designer. I will add it as soon as I can find it.

This is how it was done -

Materials:
Cardstock: Crumb Cake, Brightside 6x6 paper (Lawn Fan)
Ink: Tuxedo Black (Memento)
Stamps: Bake Me a Cake, Sophie's Sentiments (both Lawn Fawn)
Accessories: Basic rhinestones, Lemondrop twine (The Twinery), iridescent glitter.
Tools: Beautiful Wings embosslit, square punch, 2 way glue pen, dimensionals, glue tape

Tips and Tricks:
1. This card is pretty straight forward. I used the 2 way glue pen to adhere the glitter to the cupcakes and butterfly. Here's a pic of the glitter, blurry I know but you get the idea:


Stuff Ups:
1. I'm not happy with the way I stamped some of the cupcakes. The cherry is lopsided and that swirl just doesn't look good.

Pleasant Surprises:
1. The butterfly looked great with the glitter on it and the twine wrapped around it to make the body and antennae.

Monday, April 23, 2012

3rd Anniversary

Happy 3rd anniversary to my gorgeous hubby! This is the card I made for him. It's very cutesy but he likes it anyway. The muffins were inspired by this card by Chari Moss.


Here's how I made it:

Materials:
Cardstock: Confetti White, Crumb Cake, old blue that was lying around.
Ink: Tuxedo Black (Memento), Crumb Cake, markers - Crumb Cake, Bashful Blue, Pink Pirouette, Pretty in Pink, Real Red, Basic Black.
Stamps: Love n Breakfast, Sopie's Sentiments (both Lawn Fawn).
Accessories: Hemp twine, Bevelled Window Panes, blue organza ribbon (Kaiser Craft), Basic Rhinestones.
Tools: Big Shot machine, polka dot embossing folder, sponge, mini glue dots, dimensionsals.

Tips and Tricks:
1. It's pretty straight forward - the embossed white layer was sponged with Crumb Cake ink around the edges.
2. I adhered the bevelled window pane with mini glue dots because I couldn't think of a better way to keep it in place. If you know a better way, please let me know in the comments. Thanks!
3. Those spots either side of the sentiment are rhinestones.

Stuff Ups:
1. The muffins are a little big to fit under the window pane properly.
2. The confetti cardstock is gorgeous - full of little bits so it looks recycled. Unfortunately one of those bits looks like a red splotch above the sentiment, oh well.
3. The glue dots show through the window pane.
4. Probably should have positioned the centre panel lower and cut the ribbon shorter.

Pleasant Surprises:
1. I like the blue cardstock. It was a bit flimsy but the colour is pretty.
2. The muffins are cute and my colouring in was not atrocious.

Saturday, April 14, 2012

A little boy's birthday

It's been a while since I posted a 'Kate Original' card. (Obviously meaning I didn't copy or case it from anyone, it's my own creation, just a product of my crazy thoughts.) Here's one for you today! I made this card for a friend's son who turned 3 today.


Here's how it's made:

Materials:
Cardstock: Real Red, Tempting Turquoise, Whisper White.
Ink: Tempting Turquoise, Versamark, Tuxedo Black (Memento). Markers: Wild Wasabi, Soft Suede, Pumpkin Pie, So Saffron, Real Red, Tempting Turquoise, Bashful Blue, Pink Pirouette, Basic Black.
Stamps: Monster Fun (Hero Arts. I borrowed this from a friend at our card making day - thanks Shauna!), Put on Your Party Hat (Fiskars), Admit One (Lawn Fawn).
Accessories: Maraschino and Cappucino baker's twine (The Twinery), Miss Nelly jewels (Kaisercraft).
Tools: Big shot machine, Top Note die, sponge, dimensionals, 2 way glue pen, glue tape, mini glue dots, sanding block.

Tips and Tricks:
1. The blue layer was stamped randonly with a Lawn Fawn star in Versamark. I sponged around the edges with Tempting Turquoise ink.
2. I trimmed up the white top note die cut to reveal the red one beneath. Then I sanded the edges of the white (I would have used my distressing tool had I brought it with me) and sponged around it with Tempting Turquoise ink.
3. The monsters and balloons were coloured in with Stampin' Up markers. After cutting out all the monsters and balloons, I used a black marker to colour the cut edges.
4. The balloons were adhered to each other one at a time so I got the right positioning on the card. Then I attached the twine to each balloon using glue tape. After that I attached the balloons to the card with dimensionals.
5. I tied up the balloon strings and stuck them in position with a mini glue dot.
6. The mini monster is on dimensionals too to make him stand out and look like he's holding the bunch of balloons.

Stuff Ups:
1. This is just a technicality but I don't like the streakiness of the markers. There's nothing I can do about that apart from buy Copics instead.
2. The cutting out the top note die cut could have been better (as always).

Pleasant Surprises:
1. The way the red and blue contrast. I like it.
2. The stamp set is so cute. I would have been lost without it!
3. Finally, a concept I had in my head was realised in the way I wanted it to be!!

Friday, April 6, 2012

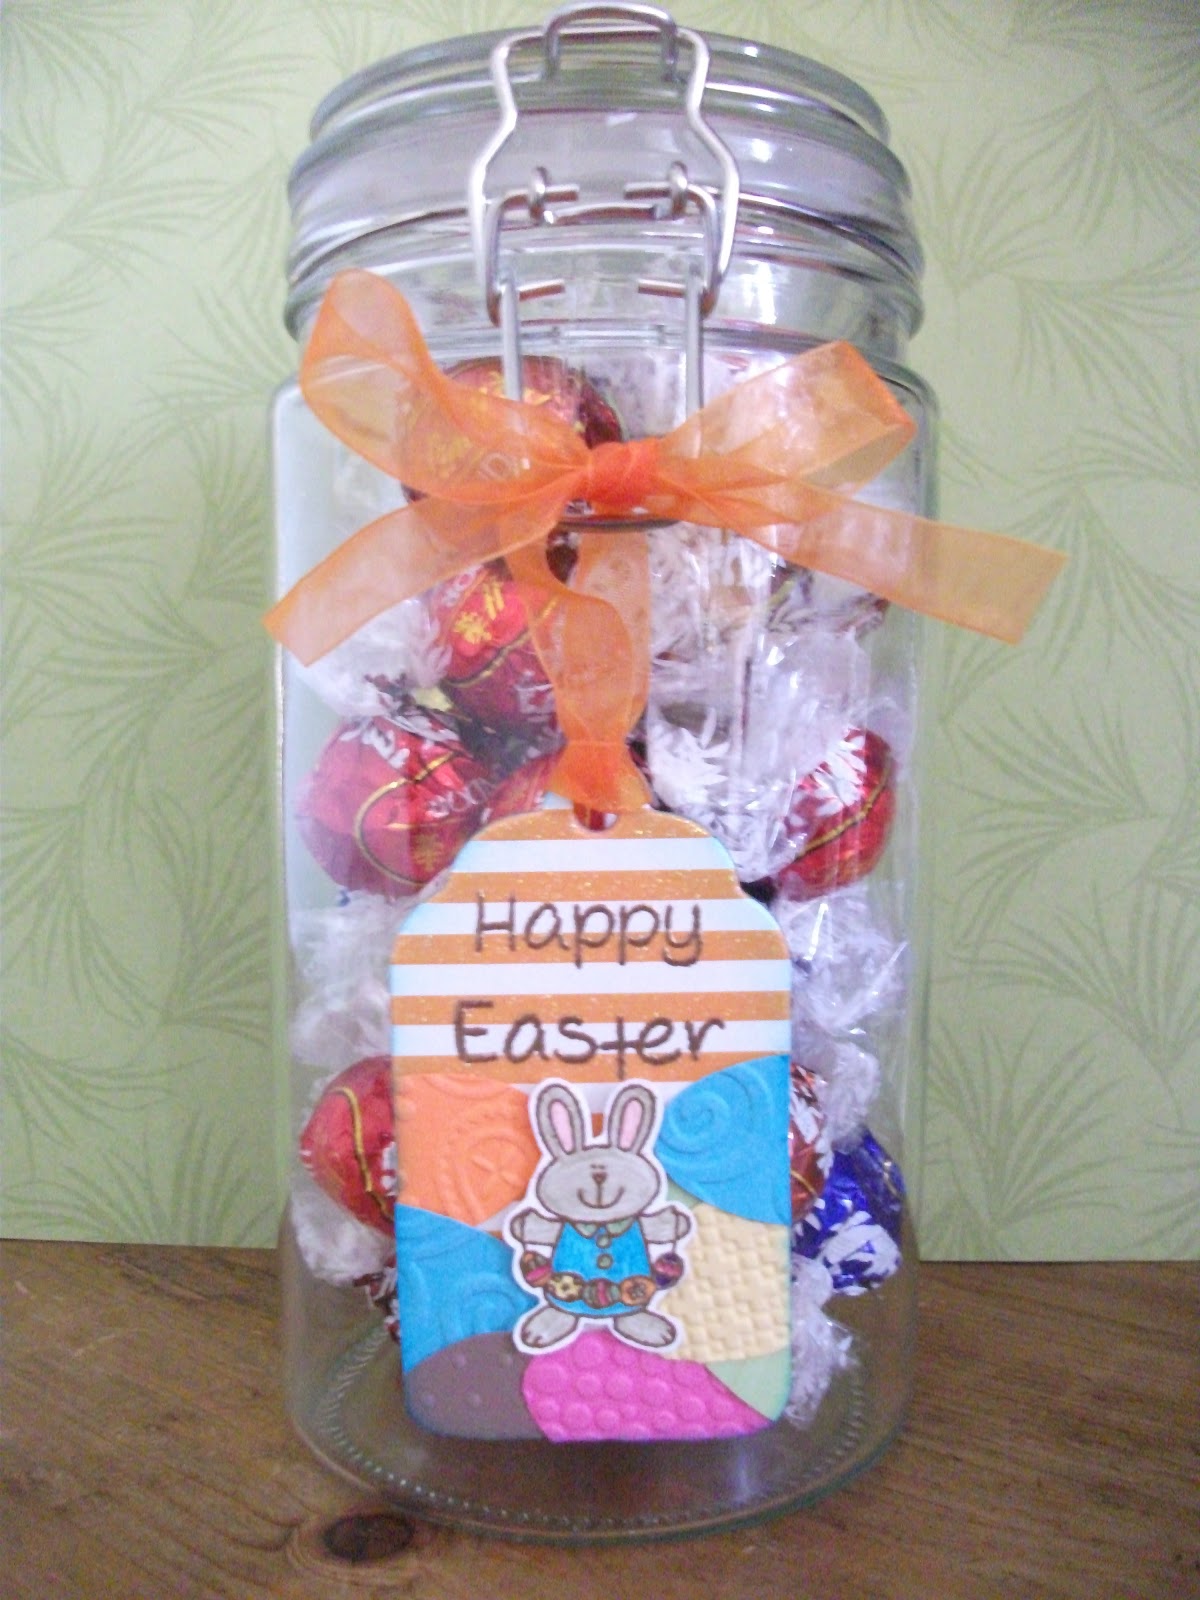
Happy Easter

I have something different to show today - not a card! I decorated a tag. I've never used tags for anything so this was new to me. I'm only moderately happy with it. The concept was better in my head, the execution of it isn't great. Oh well, I tried!


Here's a closer view of the tag:


Materials:

Cardstock: Whisper White, Tempting Turquoise, Tangerine Tango, So Saffron, Pear Pizzazz (or Kiwi Kiss, not sure), Chocolate Chip and Pink Passion (I think it's retired).
Ink: Tempting Turquoise, Versamark, markers - Tempting Turquoise, Blushing Bride, Crumb Cake, Wild Wasabi, Melon Mambo, Elegant Eggplant, Tangerine Tango, So Saffron.
Stamps: Greetings Eight (Stampin' Up), Jessie's ABC's (Lawn Fawn).
Accessories: Chipboard glitter tag (don't know the brand - it's so old!), Orange organza ribbon (Kaiser Craft), antique gold embossing powder.
Tools: Heat tool, embossing static pillow, dimensionals, big shot machine, sponge, lattice embossing folder (Stampin' Up), paisley and swirly embossing folders (Sizzix), polka dot and bubble embossing folders (Cuttlebug), paper snips, oval punch, glue tape.

Tips and Tricks:
1. I heat embossed the Happy Easter sentiment and bunny first.
2. Then I sponged around the tag and let it dry.
3. I punched and embossed the coloured Easter eggs (yes, that's what they are meant to be!).
4. After positioning the Easter eggs with glue tape I trimmed off the excess and sponged around the edges.
5. The bunny was added on dimensionals. Dimensionals are also used to adhere the tag to the jar.

Stuff Ups:
1. The overall result - just not thrilled.
2. The 't' in Easter is upside down. *sigh*
3. Maybe the Easter eggs should have been smaller so they actually look like Easter eggs.

Pleasant Surprises:
1. The bunny is cute and I managed to cut it out nicely.
2. The sponging on the tag itself was nice (just the tag, not the eggs).
3. The heat embossing turned out nicely.